模板应用实例
HelloWorld/
|-- HelloWorld
|   |-- __init__.py
|   |-- __init__.pyc
|   |-- settings.py
|   |-- settings.pyc
|   |-- urls.py
|   |-- urls.pyc
|   |-- view.py
|   |-- view.pyc
|   |-- wsgi.py
|   `-- wsgi.pyc
|-- manage.py
`-- templates
    `-- hello.html
hello.html 文件代码如下:
<h1>{{ hello }}</h1>接下来我们需要向Django说明模板文件的路径,修改HelloWorld/settings.py,修改 TEMPLATES 中的 DIRS 为 [BASE_DIR+"/templates",],如下所示:
...TEMPLATES = [
    {
        'BACKEND': 'django.template.backends.django.DjangoTemplates',
        'DIRS': [BASE_DIR+"/templates",],       # 修改位置
        'APP_DIRS': True,
        'OPTIONS': {
            'context_processors': [
                'django.template.context_processors.debug',
                'django.template.context_processors.request',
                'django.contrib.auth.context_processors.auth',
                'django.contrib.messages.context_processors.messages',
            ],
        },
    },
]
...
我们现在修改 view.py,增加一个新的对象,用于向模板提交数据:
# -*- coding: utf-8 -*-

#from django.http import HttpResponse
from django.shortcuts import render

def hello(request):
    context          = {}
    context['hello'] = 'Hello World!'
    return render(request, 'hello.html', context)
可以看到,我们这里使用 render 来替代之前使用的 HttpResponse。render 还使用了一个字典 context 作为参数。
context 字典中元素的键值 "hello" 对应了模板中的变量 "{{ hello }}"。
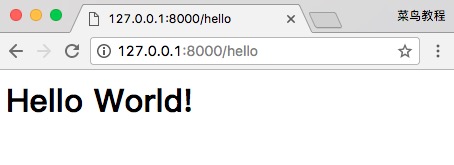
再访问访问 http://127.0.0.1:8000/hello,可以看到页面:
Django 模板标签
if/else 标签 基本语法格式如下:
{% if condition %}
     ... display
{% endif %}
或者
{% if condition1 %}
   ... display 1
{% elif condition2 %}
   ... display 2
{% else %}
   ... display 3
{% endif %}
根据条件判断是否输出。if/else 支持嵌套。 {% if %} 标签接受 and , or 或者 not 关键字来对多个变量做判断 ,或者对变量取反( not ),例如:
{% if athlete_list and coach_list %}
     athletes 和 coaches 变量都是可用的。
{% endif %}